3D Printed Curta Part VI
- Marcus Wu
- 3 dprinting , Curta
- February 2, 2016
Time for change
I changed jobs and moved to the home of the Carolina Panthers last year and have been busy getting settled in the new house. There are still a lot of things to do and boxes to unpack, but I got my office (mostly) set up and managed to run a few prints. On a side note, Go Panthers! Play well in the Super Bowl this weekend.
Long prints and support material
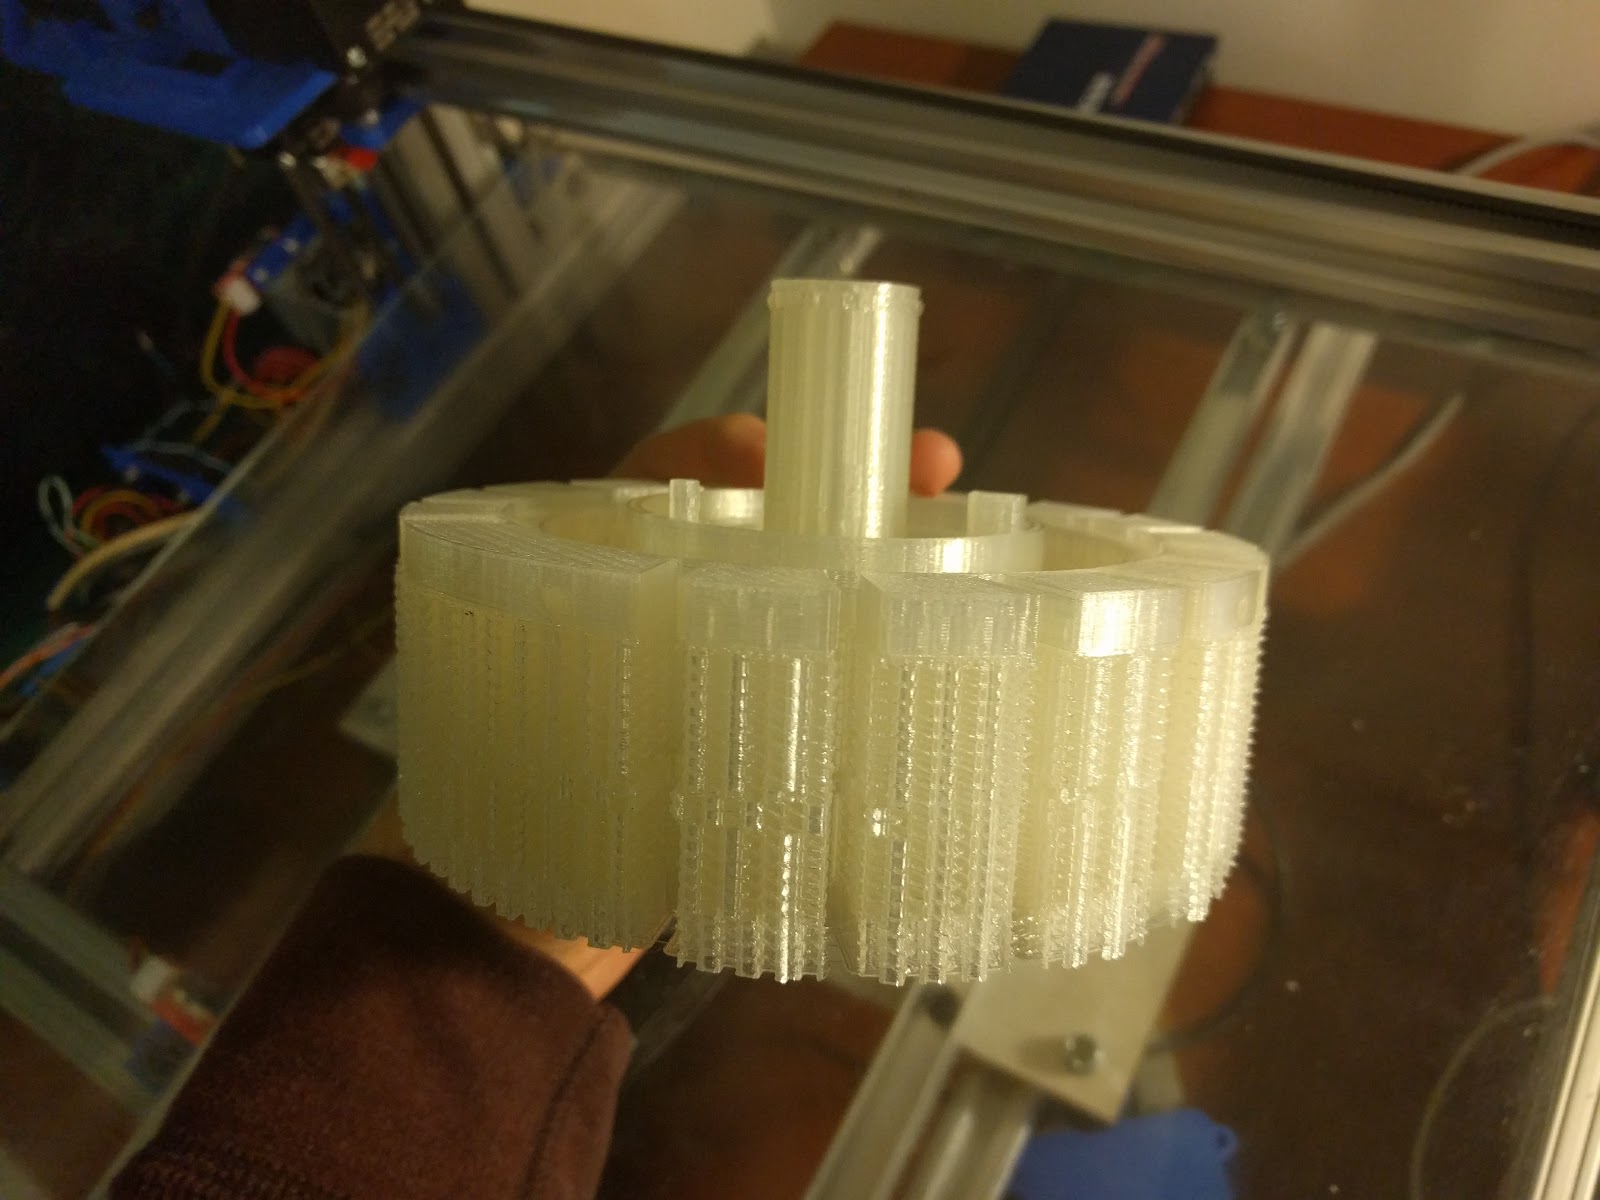
The first few prints I did after getting the printer up and running again were little things to help recalibrate the printer after being lugged a few hundred miles. After I was confident in its ability to print consistently I challenged it with the main upper body of the Curta.
The main body of the Curta has a lot of overhangs which cannot be printed without support material. I slice my models with Simplify 3D which has really great support material generation that is easy to break away. It does it by producing narrow zig-zagged walls and a one layer gap (configurable) interfacing with the model. The supports are flexible due to the single pass width and are not as securely bound due to the one layer gap. The zig-zag pattern combined with the flexibility allows the supports to be compressed which helps them to easily break cleanly away from the model.
If you are familiar with FDM / FFF 3D printing, you are familiar with parts curling. As the plastic cools, it shrinks some and pulls on previous layers. If it pulls enough, it can cause the edges of your print to curl / peel off of the print bed. The plastic I use (PLA) is much better at not doing this than other plastics, but it can still happen. Particularly if the printer doesn’t have a heat bed such as mine. The first time I attempted to print the main body I ran into troubles with this. The support material being only one extrusion-width wide has a small footprint on the print bed and in the case of the main body, many layers to pull against the first layer. That caused some warping on my first print which I had to cancel.
On my second attempt, I told Simplify 3D to alternate support direction by 45 degrees once every ten layers. That helped a lot. I no longer had any curling / peeling issues. In fact, the print was so strongly attached to the print bed I had to use a heat gun to warm the bed up from underneath before I could pry it up. However those alternating direction layers in the support also worked to strengthen the support material making it more difficult to remove from the main body.
On my next print, I reprinted the tens bell I had misaligned in my previous post (the tens bell handles carry operations in the Curta). I decided to go back to Simplify 3D’s default support settings. I chose to do that partially because I had printed that part before with no issues and partially because of the difficulty I had removing the support material from the main body. Removing the supports this time was surprisingly just as difficult (if not harder due to the small spaces). I believe this to be due to the material I printed with this time around. I used a clear PLA from Monoprice. It prints very well and it did come out pretty clean, but I think it binds to itself much more readily making the supports more difficult to remove. Due to the nature of the Curta parts, I will be using a different material from here on out.
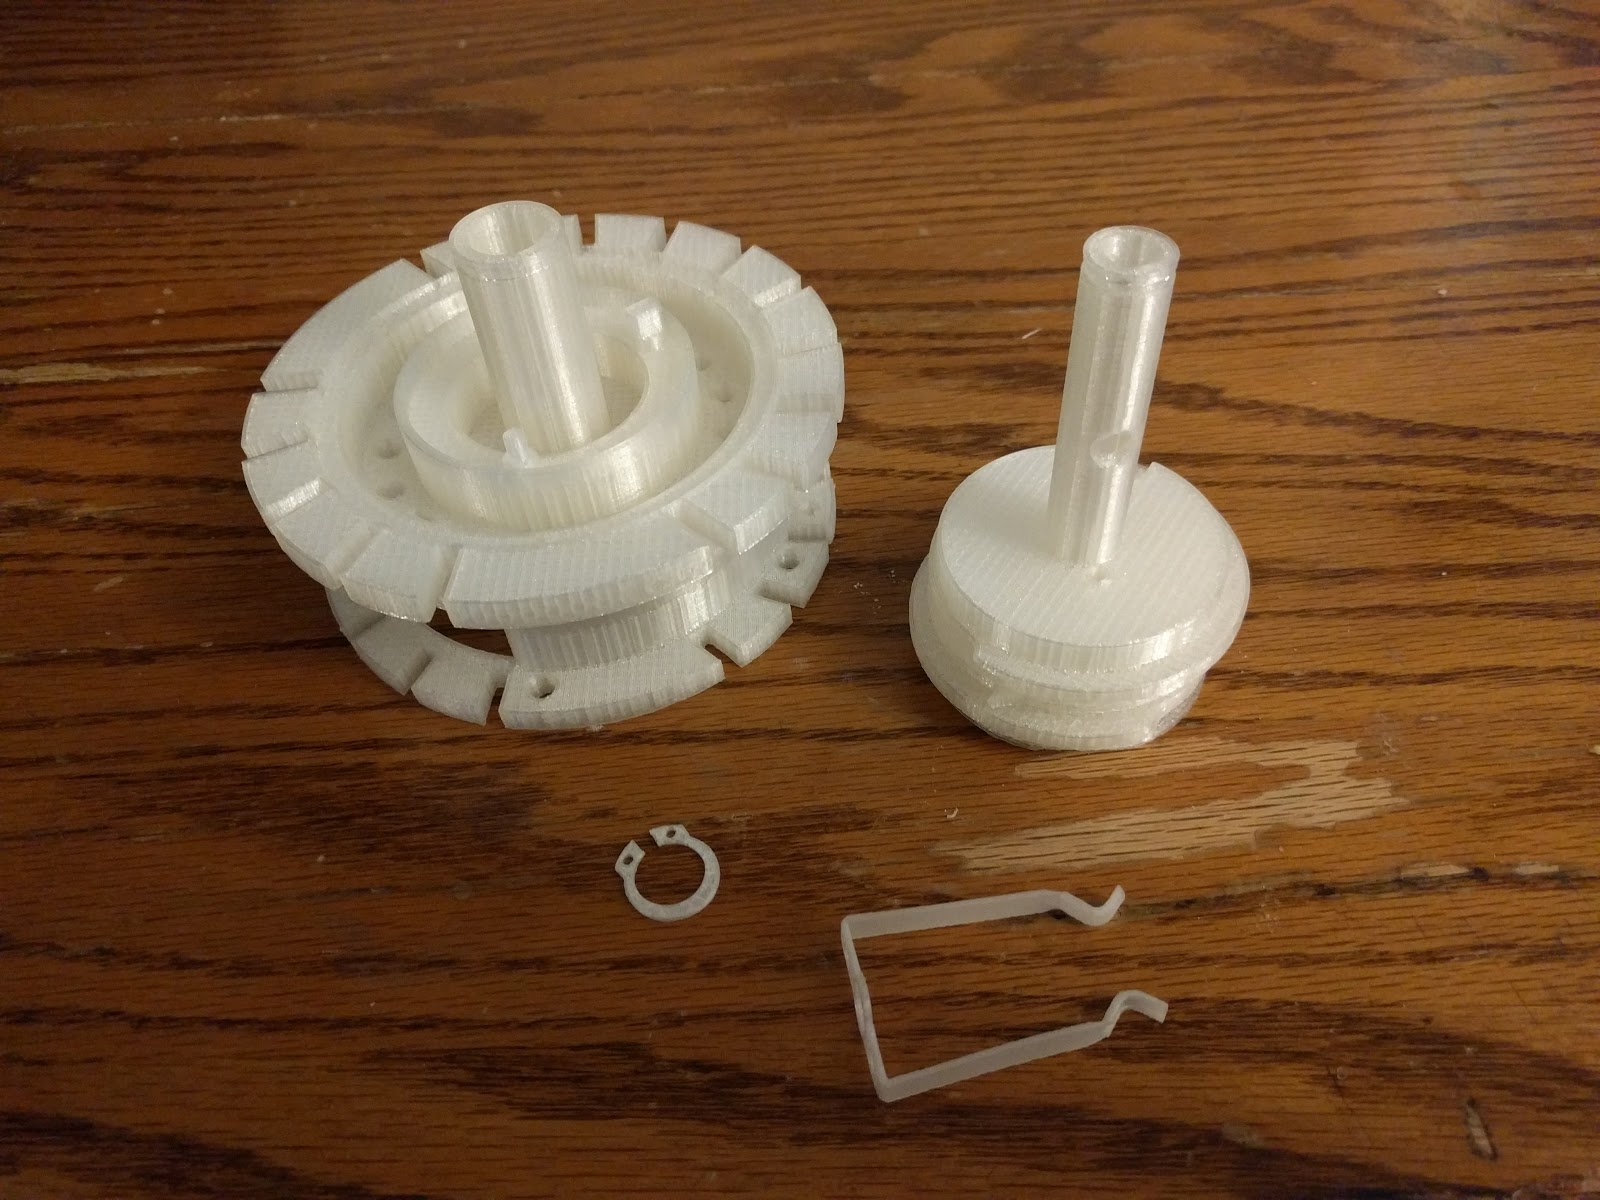
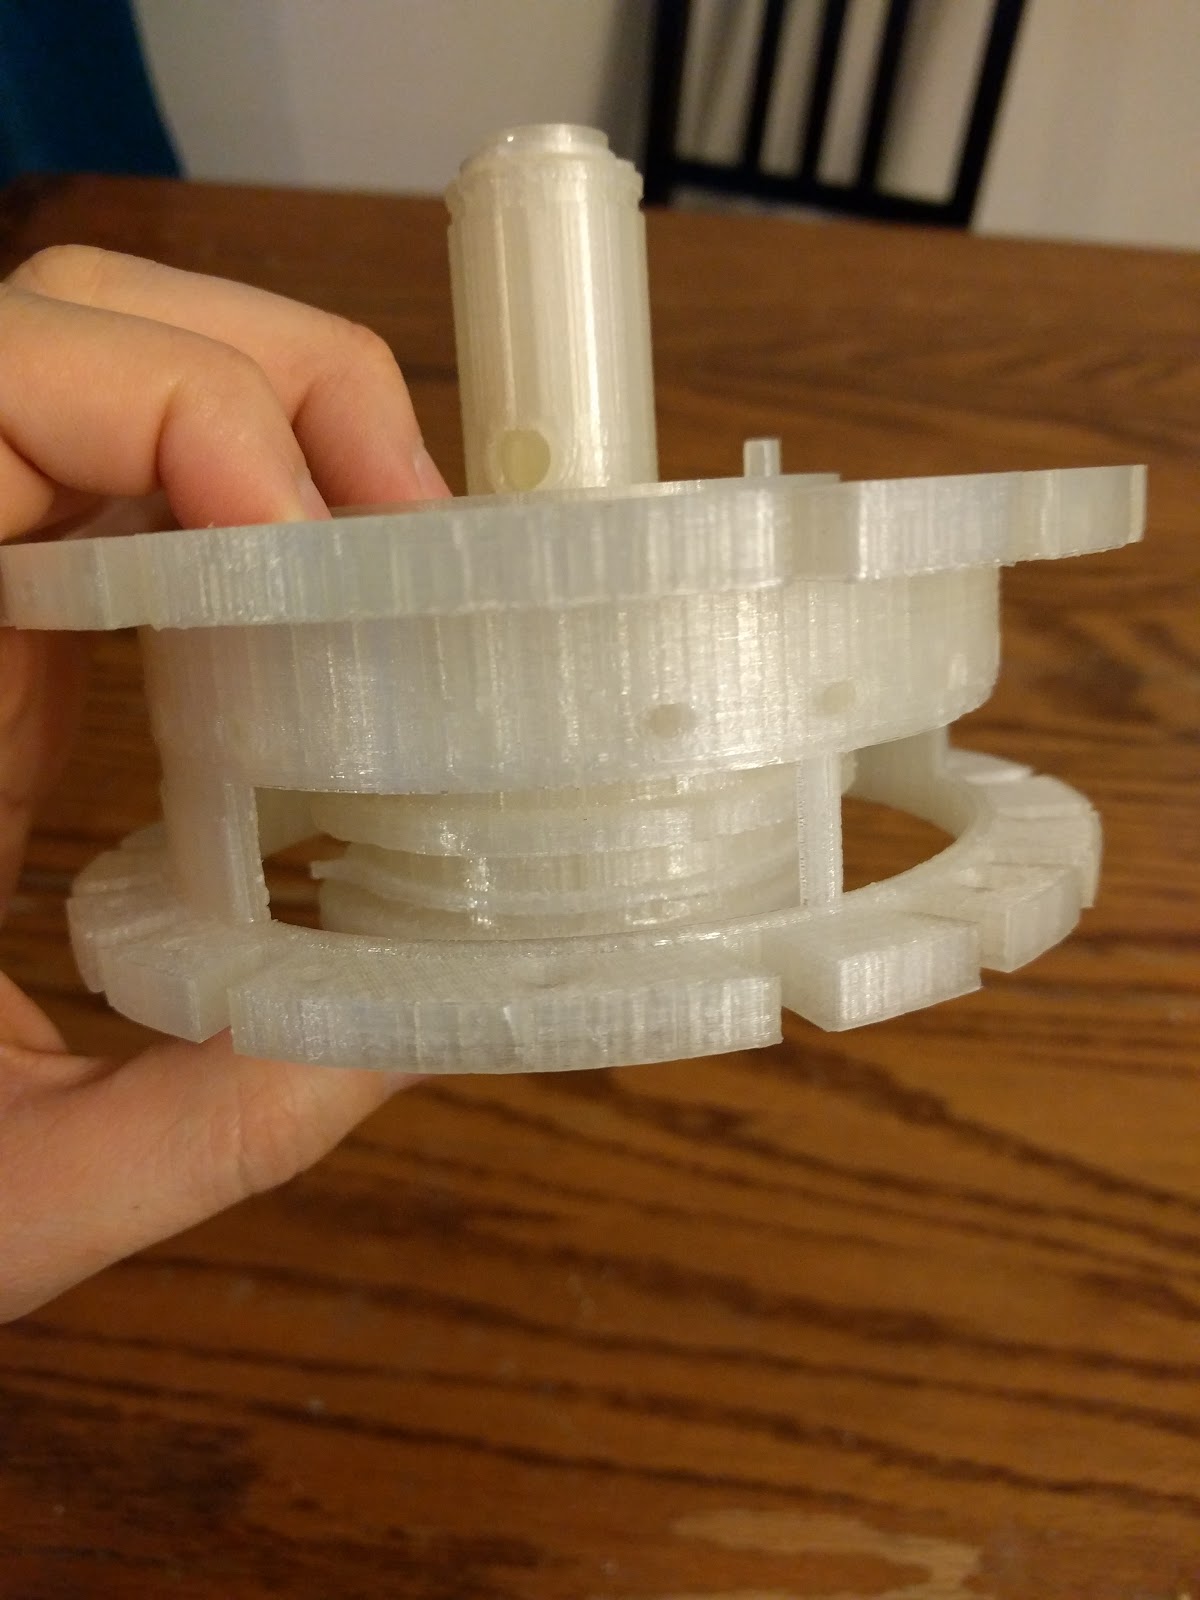
After printing the tens bell and main body out and removing the supports from each, I was able to assemble them together using a printed c-clip also designed from the engineering drawings. There is a washer that is supposed to be under the c-clip to provide proper spacing, but I have not yet printed that. As far as I can tell everything seems to line up correctly, but I will know more when I can assemble more. The tens bell rotates well in the main body, but I may smooth the print layers a little bit and add some lubrication before final assembly. I also printed the spring that attaches to the bottom of the tens bell. It does have some spring to it, but I don’t think it is enough. I may need to fabricate that out of metal.
I recorded time lapse videos of the prints. Unfortunately my printer does move the print bed back and forth which makes the part appear to jump in the video. I will look into mounting the camera directly on the print bed, but that may not be possible without compromising the print on this printer. I am planning to build a Triple C-bot which only moves the print bed vertically. If I finish that before I finish the Curta, I will begin recording my prints on that.
Main body timelapse
Tens bell timelapse
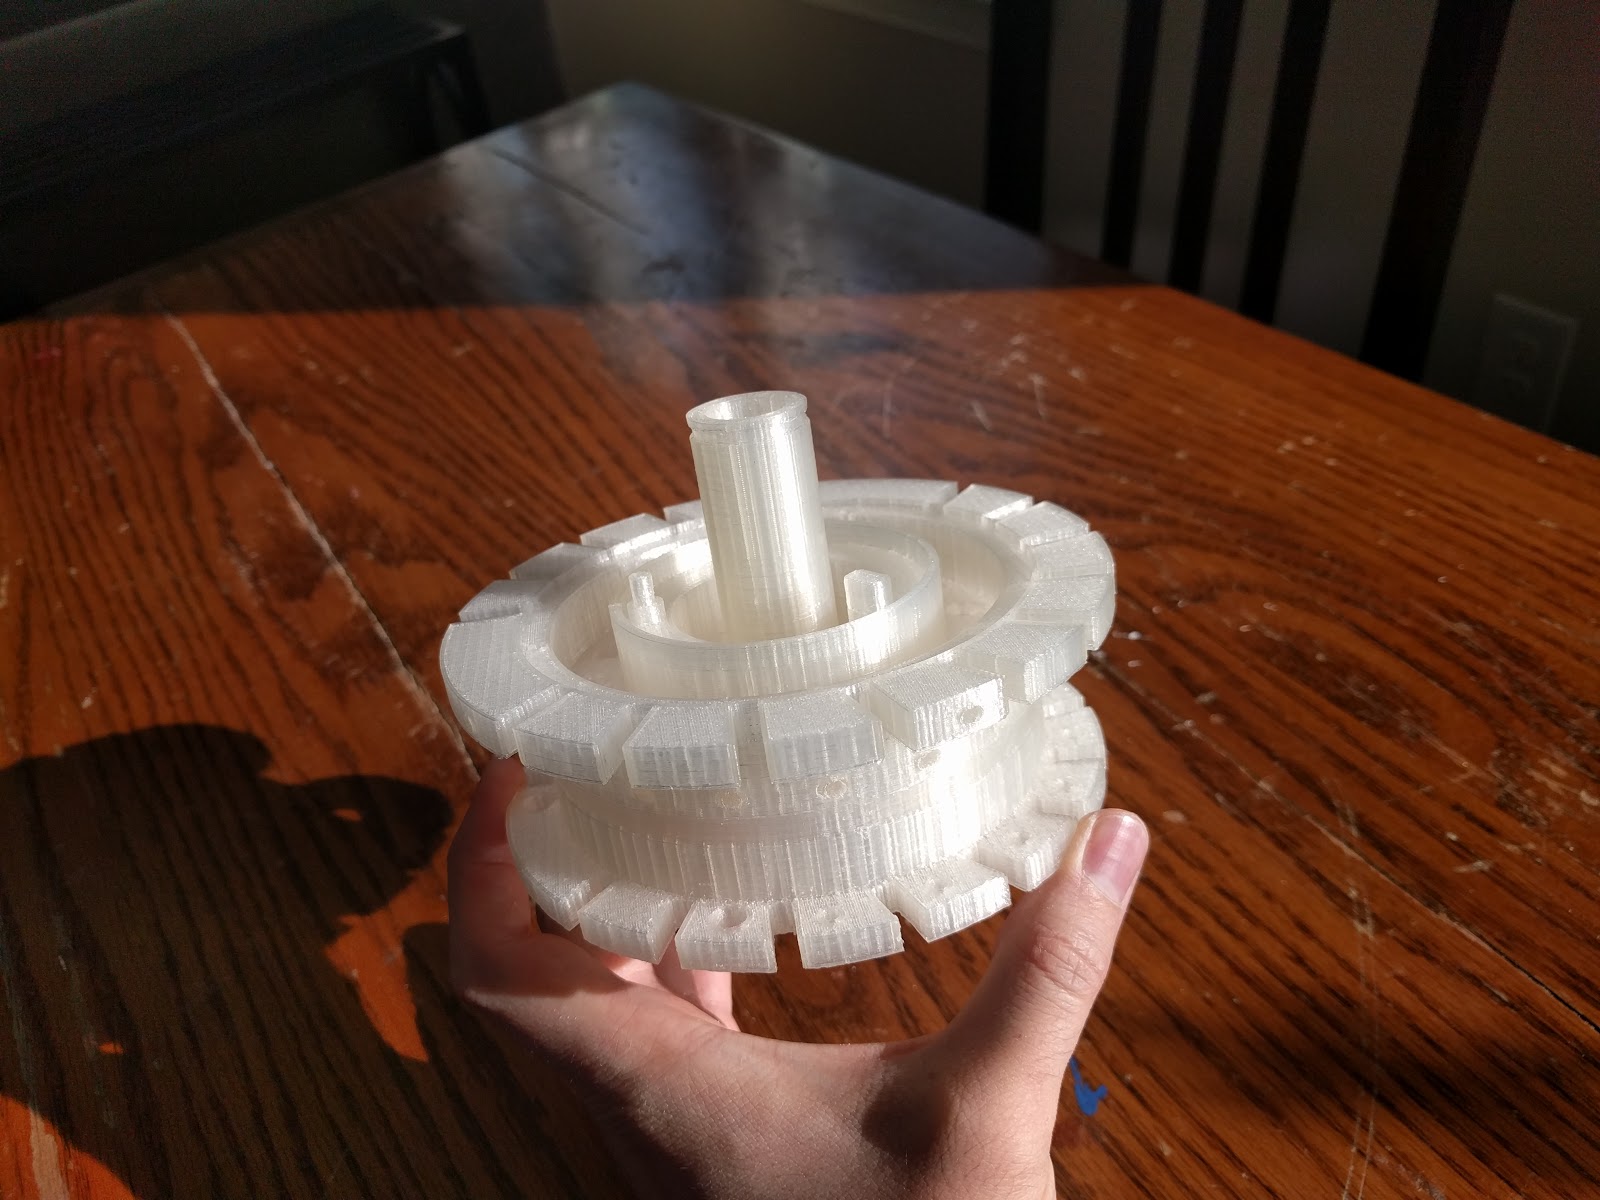
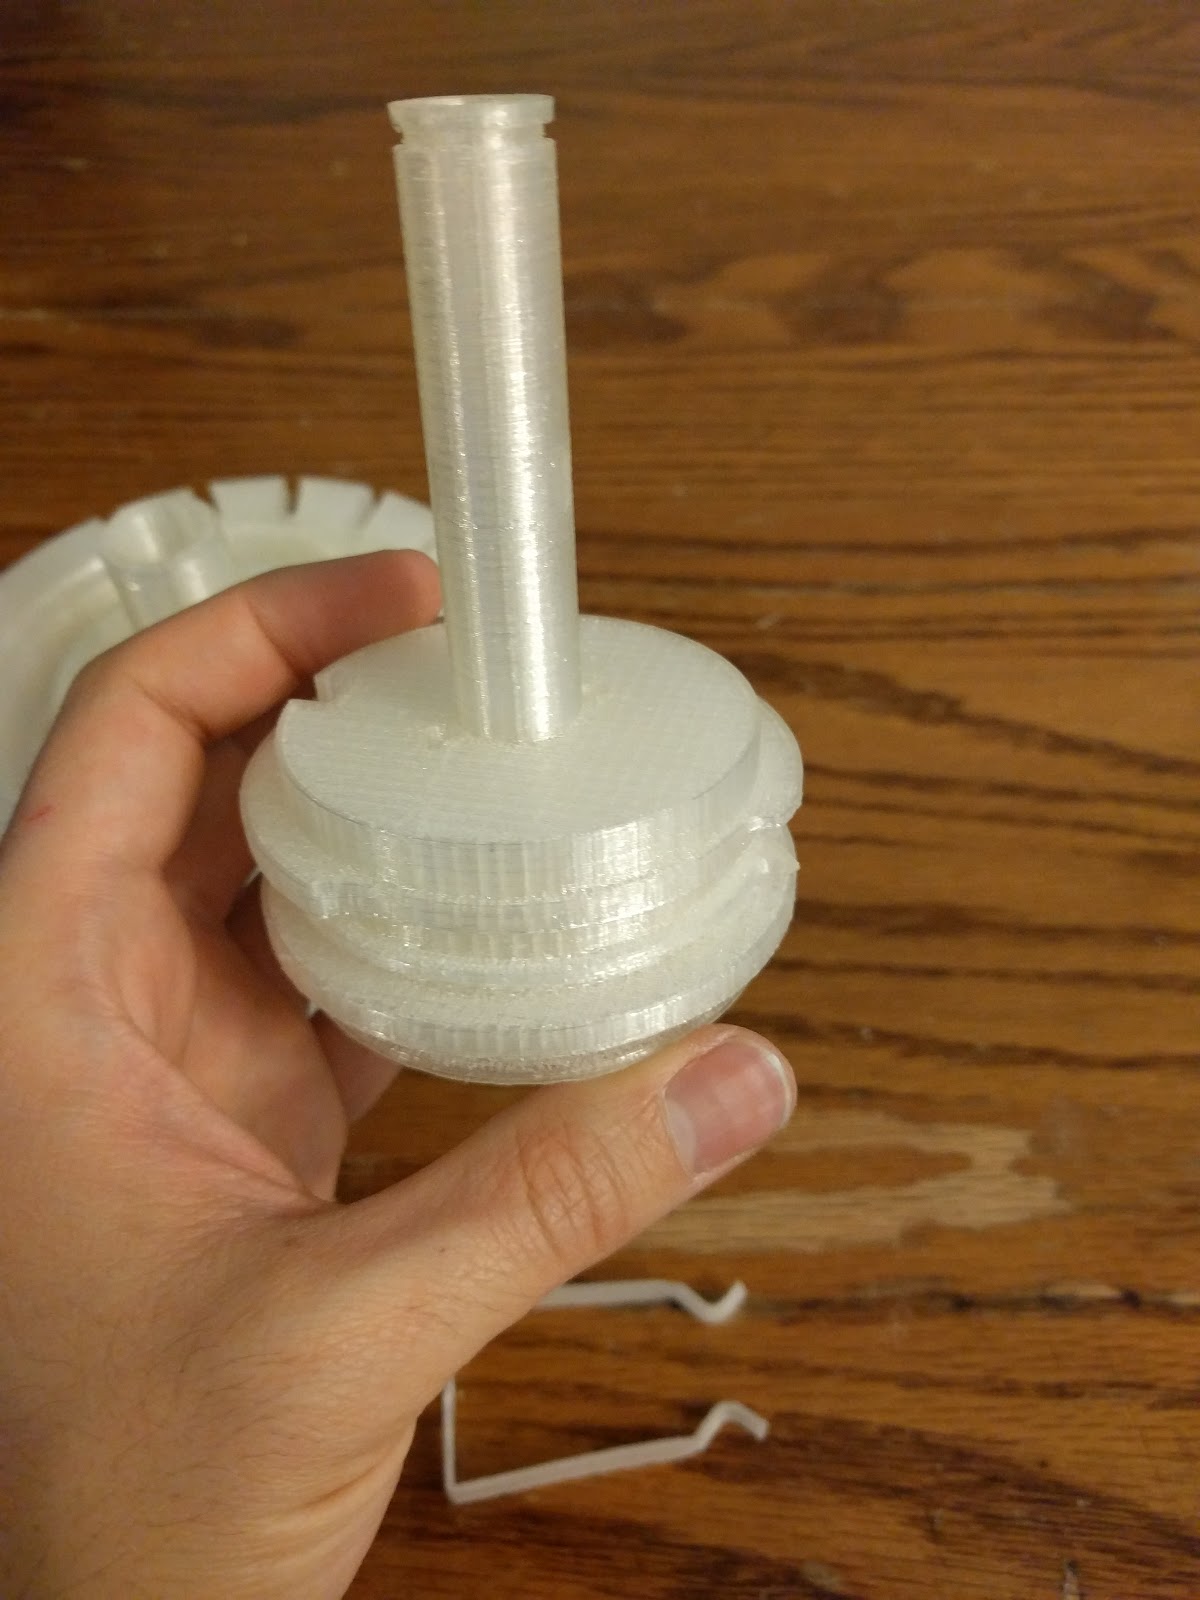
Descriptions of the gallery photos below in order:
- The main body right off of the print bed
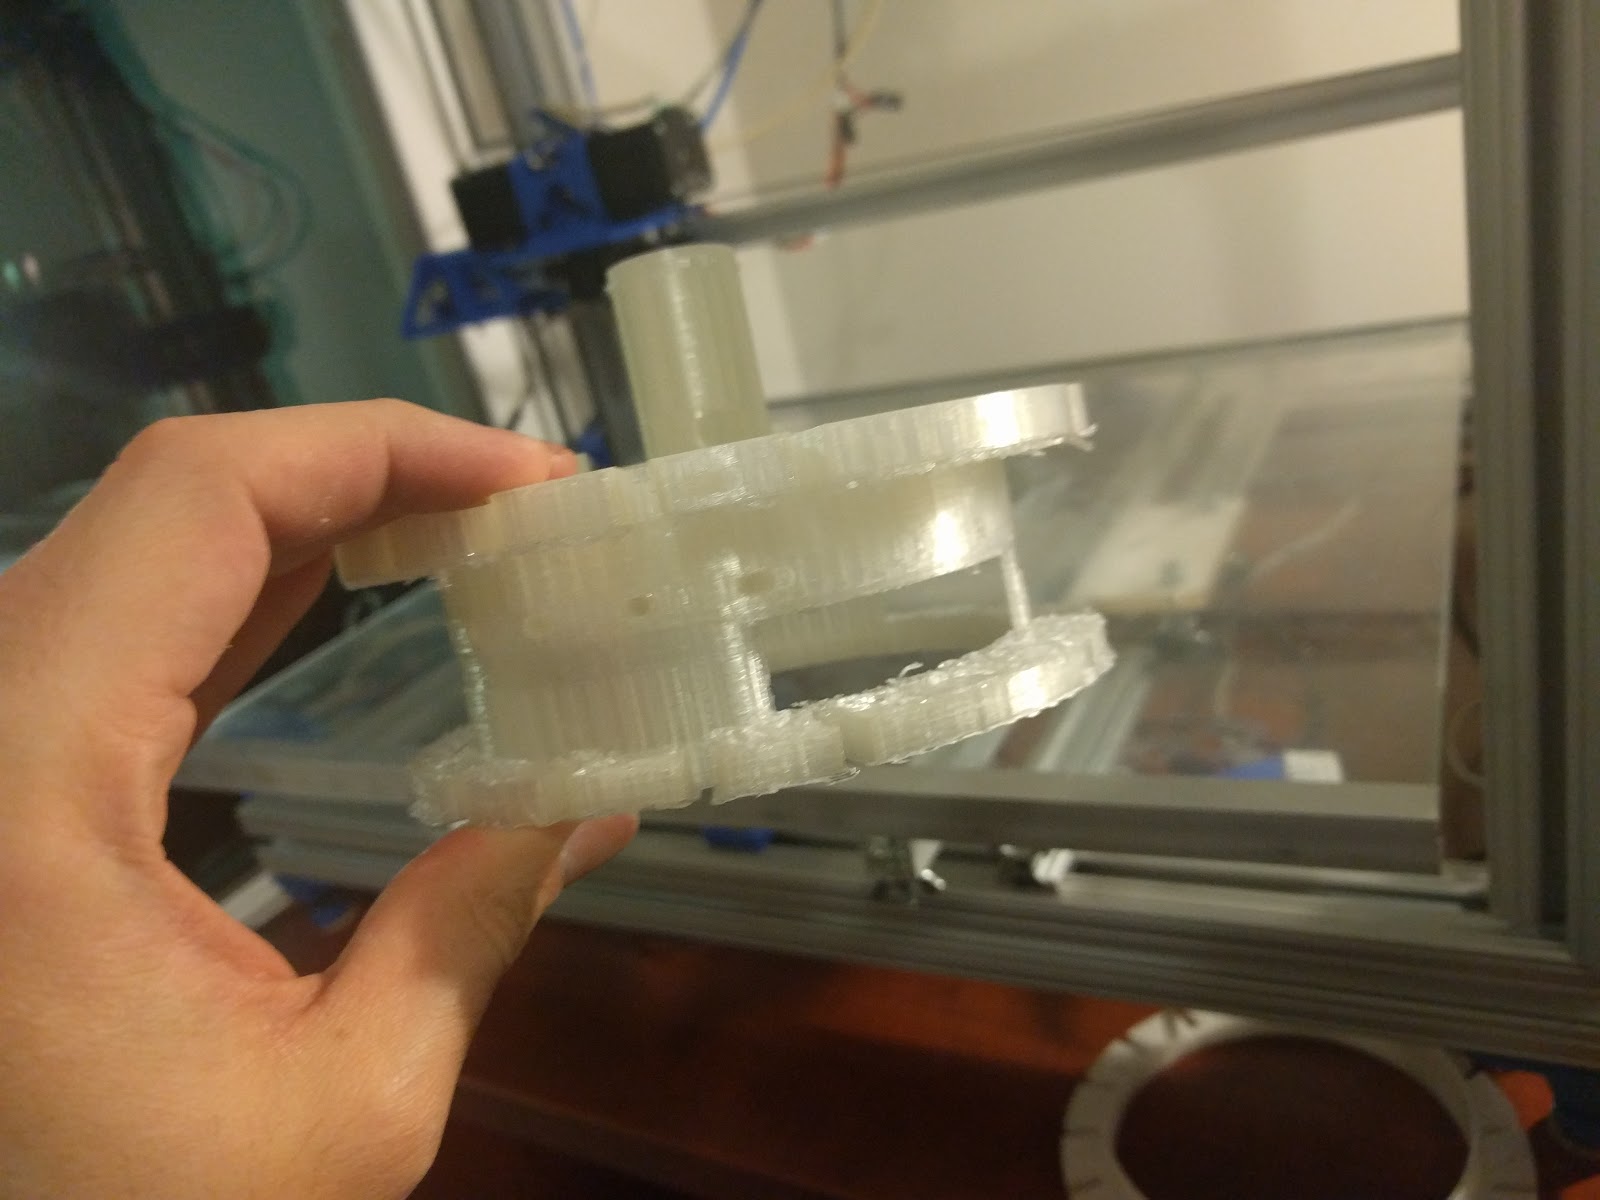
- The underside of the main body showing the support layers. Also note the brim
- Here I have removed the majority of the support material, but bits of it remain making the surface rough
- The roughness from the support material seen from a different angle
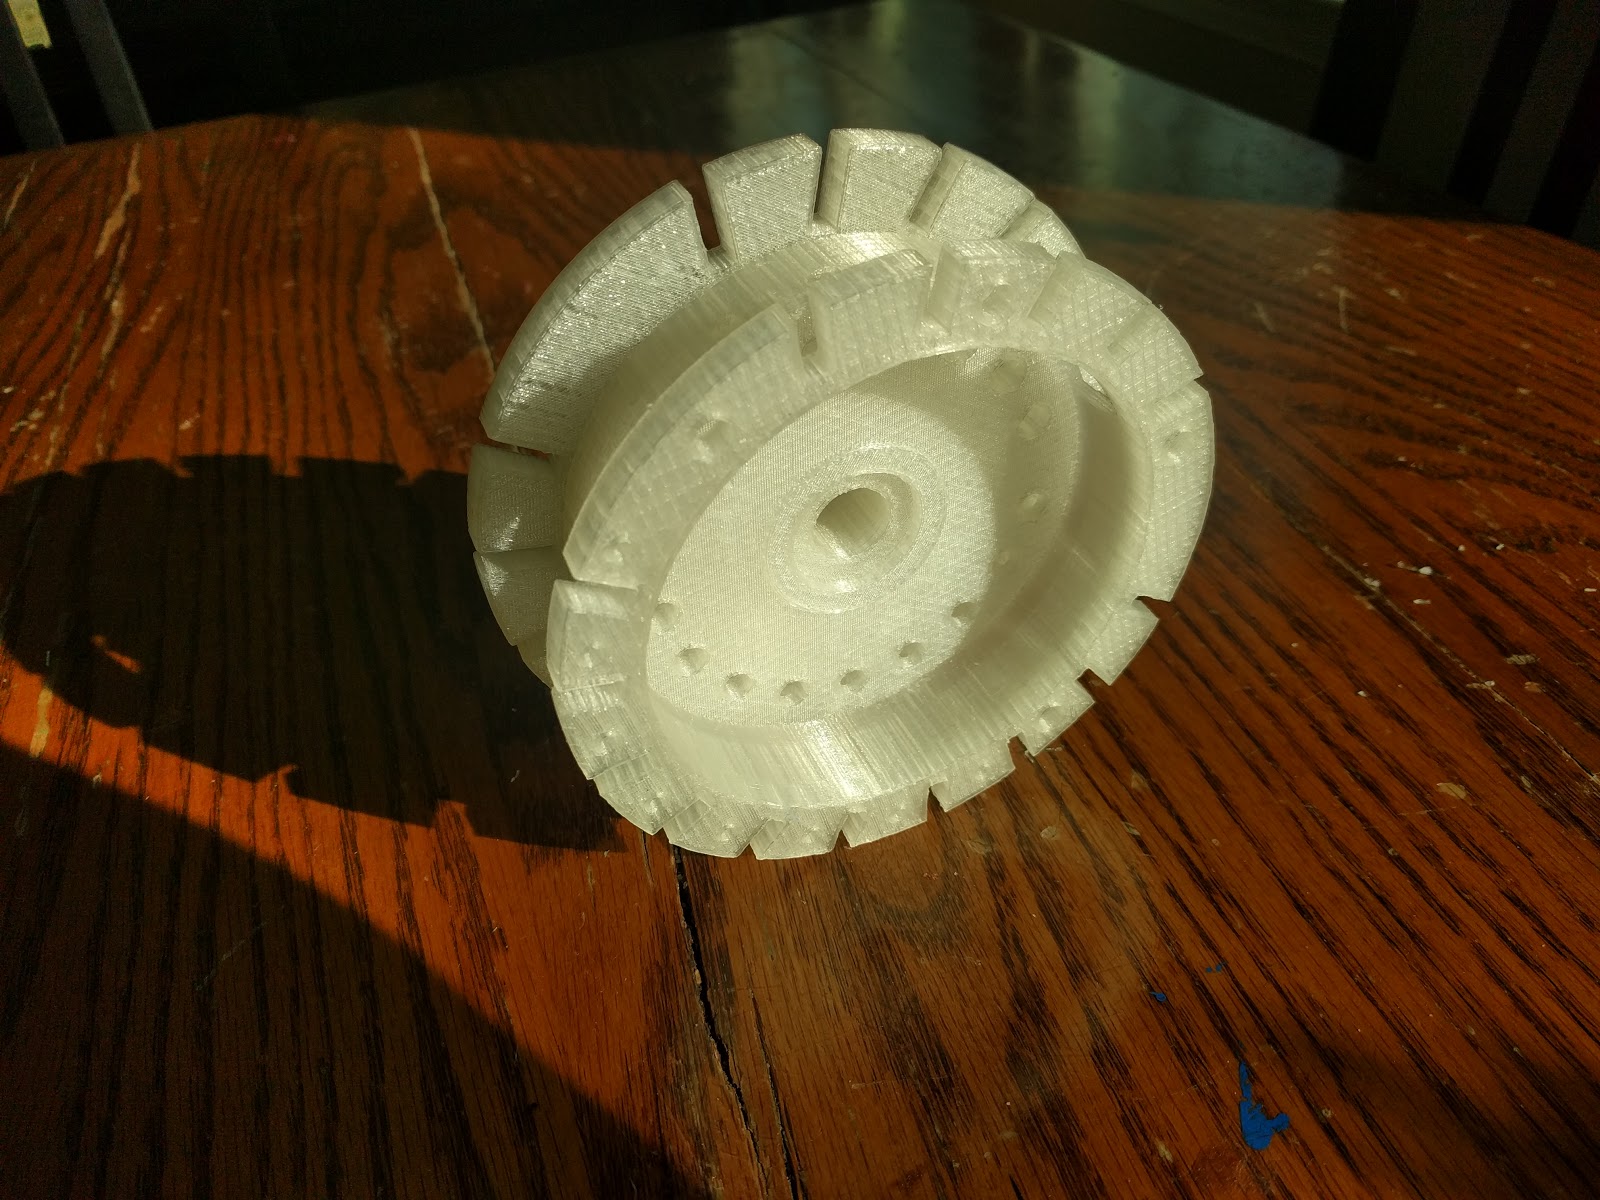
- The fully cleaned main body
- The main body from the top
- Another view of the main body
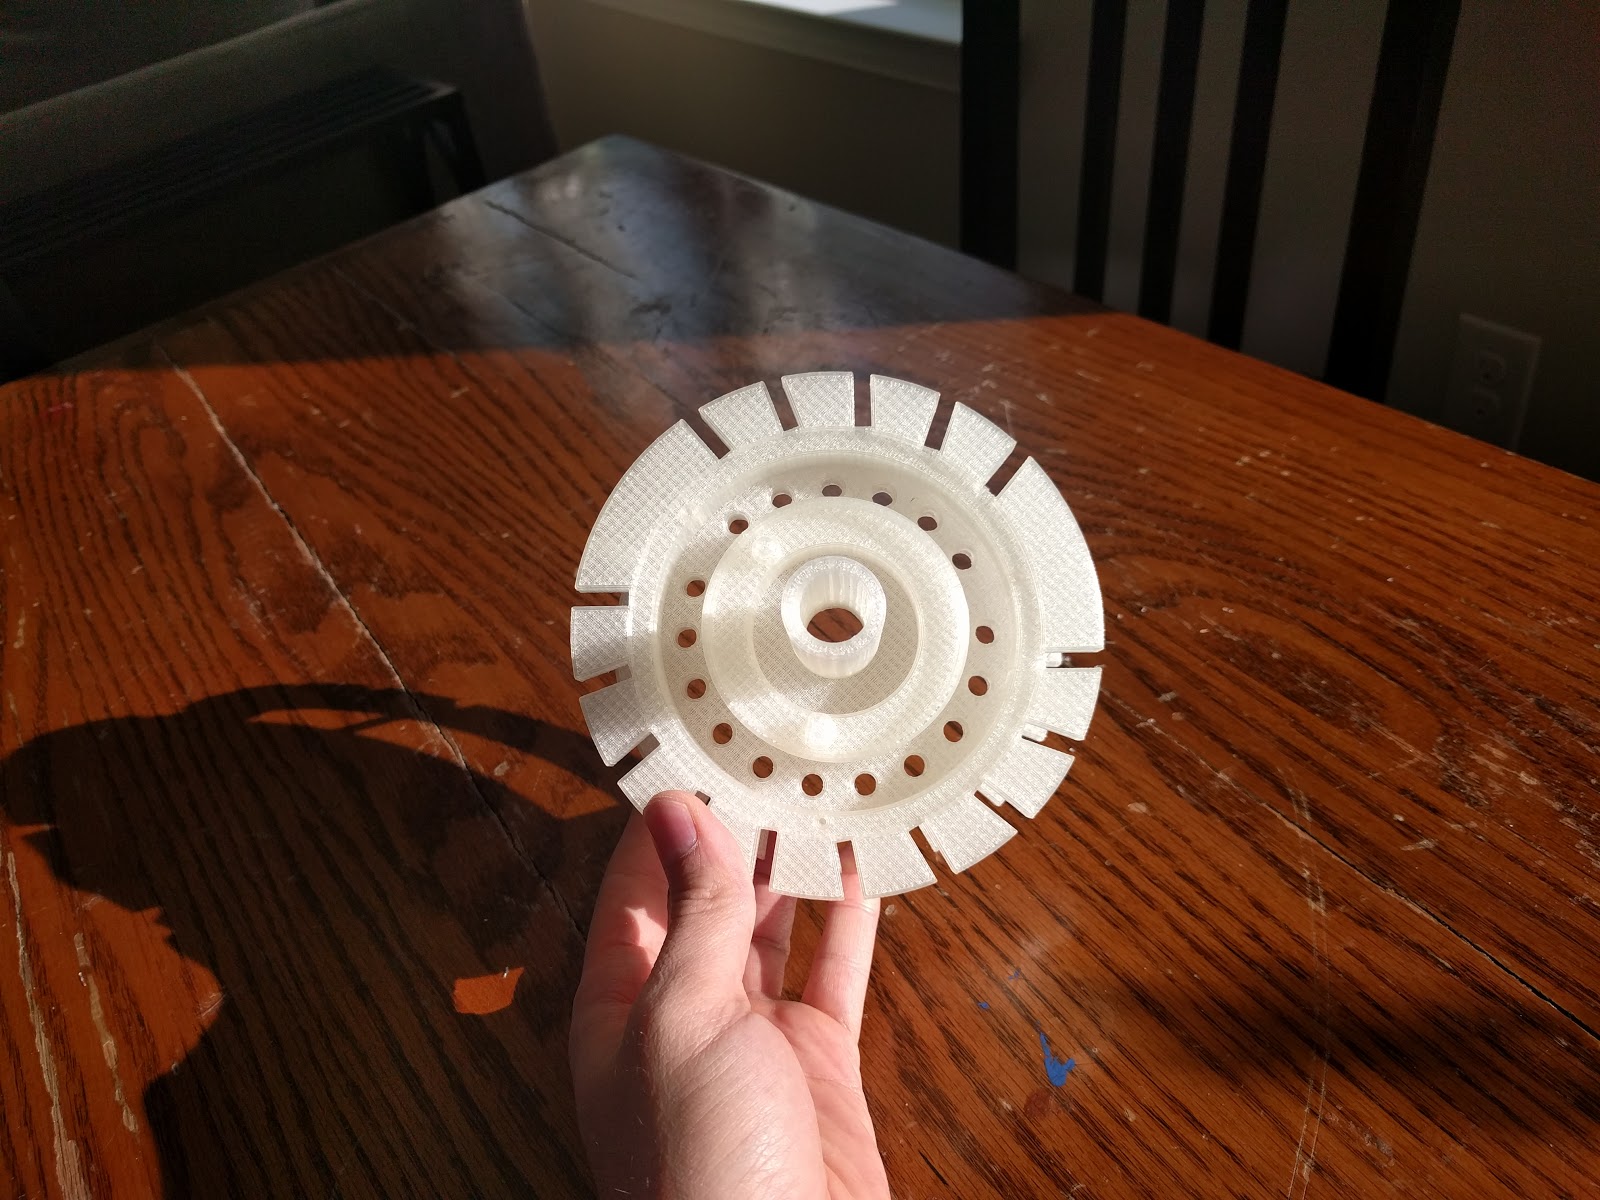
- The corrected and reprinted tens bell
- The tens bell, spring, c-clip, and main body
- The tens bell connected to the main body with the c-clip